Epoxy Garage Floors: Is the DIY Kit Worth the Effort?
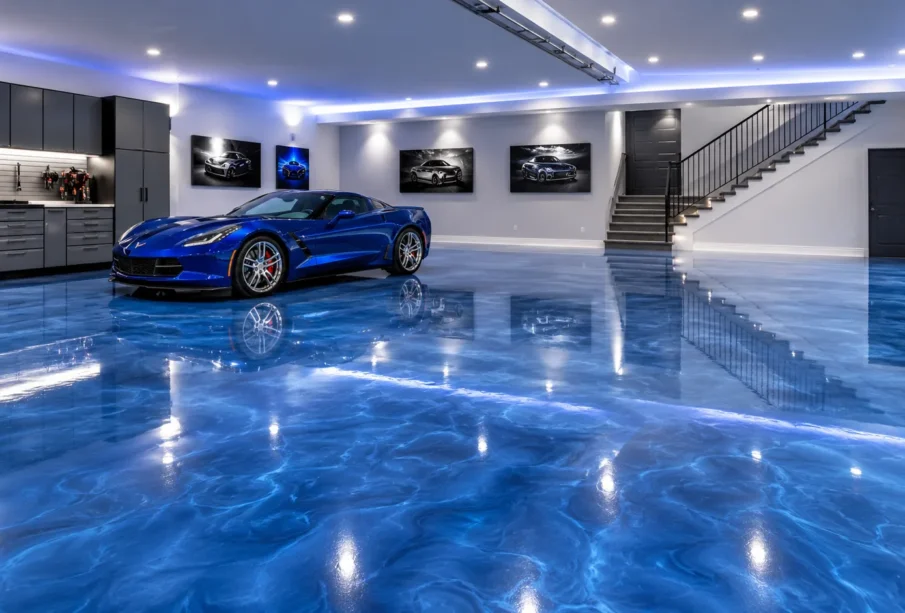
Few home improvement projects promise such an immediate visual transformation as coating a dingy, oil-stained concrete slab with a gleaming epoxy finish. Walk down the flooring aisle of any major hardware store, and you will see colorful boxed kits displaying immaculate, showroom-quality garages where pristine sports cars sit on high-gloss, speckled floors. The retail pitch is undeniably seductive: for roughly one or two hundred dollars and a weekend of physical labor, you can convert your dusty utility zone into a sleek, functional extension of your living space.
The reality, however, often looks much different eighteen months down the road. Across the country, thousands of homeowners who spent their weekends scrubbing, rolling, and broadcasting decorative flakes find themselves staring at cloudy finishes, bubbling topcoats, and wide swaths of bare concrete where hot tires tore the coating clean off the slab.
Deciding whether a DIY epoxy kit is genuinely worth your time, energy, and financial investment requires understanding the wide gulf between retail marketing and chemical reality. A successful floor coating is not simply a weekend paint job; it is a complex polymer bond that demands rigorous surface mechanics, chemical compatibility, and precise environmental timing.
The Chemistry Behind the Box: Paint vs. True Epoxy
To understand why so many DIY garage floor projects fail prematurely, you must first look at what is actually inside those retail boxes. True commercial-grade epoxy is not paint. It is a two-part thermosetting resin system composed of a base resin and a polyamine hardener. When blended in exact proportions, these two compounds trigger an exothermic chemical reaction that cross-links molecular chains, curing into a dense, rigid plastic that bonds tenaciously to porous concrete.
Most off-the-shelf consumer kits, by contrast, are water-based epoxy paint formulations. While they do contain a modest amount of epoxy resin, the carrier fluid is primarily water or mild solvent. In industry terminology, this is referred to as low solids content, typically hovering between 40 and 50 percent.
When you roll a low-solids product onto the floor, half of the wet coating evaporates into thin air as the water dries. What remains on the concrete is an extremely thin film, often measuring just two to three mils in thickness—roughly equivalent to a single sheet of office printer paper.
Professional installers, on the other hand, almost universally rely on 100 percent solids epoxy coupled with aliphatic polyaspartic or polyurethane topcoats. Because there is no carrier solvent or water to evaporate, every drop applied to the floor stays on the floor. The resulting base coat cures to a thickness of ten to sixteen mils or more, creating an impenetrable structural armor that easily absorbs impacts from dropped wrenches, chemical exposure from road salts, and the intense thermal friction generated by vehicle tires.
The Concrete Preparation Paradox
The most unforgiving aspect of any resinous flooring project is surface preparation. Paint sticks by sticking; epoxy bonds by mechanical adhesion. For an epoxy coating to achieve a permanent grip, it must flow deep into the microscopic open pores and capillary channels of the concrete slab before hardening. If those pores are blocked, contaminated, or polished smooth by machine finishing, the bond will inevitably fail.
Chemical Acid Etching vs. Mechanical Grinding
Nearly every DIY kit provides a small packet of citric or mild muriatic acid crystals intended to etch the concrete floor. The instructions suggest sprinkling the solution, scrubbing with a stiff broom for fifteen minutes, and rinsing the residue away with a garden hose.
While chemical etching can work on soft, unsealed, extremely porous concrete, it is notoriously unreliable for several reasons:
-
Trowel finish resistance: Modern residential garages are finished using smooth power trowels, which compress the surface cream into an exceptionally dense, slick sheen that weak acid solutions barely disturb.
-
Neutralization failures: Acid must be completely neutralized with an alkaline wash and thoroughly flushed out. If acidic residues or salts remain trapped inside the microscopic pores, they will chemically attack the curing epoxy from beneath.
-
Trapped moisture: Soaking a garage slab with dozens of gallons of rinse water introduces severe moisture loads into the concrete. Concrete acts like an enormous, dense sponge. Sealing an epoxy layer over a slab that has not dried for several consecutive days traps that moisture beneath an impermeable film, guaranteeing future blistering.
Professional contractors rarely use acid etching. Instead, they use heavy, planetary diamond grinders connected to industrial HEPA dust extractors. Diamond tooling mechanically shaves away the brittle surface layer of laitance, opening the aggregate pores and creating a concrete surface profile that feels like medium-grit sandpaper. This aggressive mechanical profile provides thousands of microscopic anchoring points for the resin to latch onto physically.
The Threat of Oil Saturation and Moisture Vapor
Garages house automobiles, lawn equipment, and household machinery, all of which drop engine oil, transmission fluid, and brake cleaner onto untreated concrete over years of use. Hydrocarbons penetrate deep into the slab. Simply spraying an all-purpose degreaser over an oil spot before rolling DIY epoxy does not pull petroleum out of the lower pores. As the slab warms in summer, that oil slowly migrates upward, breaking the bond and causing the epoxy to lift in large sheets.
Even more challenging is moisture vapor transmission. Concrete slabs poured directly over earth without an intact poly vapor barrier naturally pull moisture up from the ground through capillary action. When that vapor reaches the surface and encounters an impermeable epoxy shell, hydrostatic pressure builds until the water blows bubbles directly through the coating. Commercial contractors use electronic moisture meters and calcium chloride tests to verify moisture emissions before applying specialized moisture-mitigating primer coats. DIY kits completely ignore this subterranean reality.
The Reality of Hot-Tire Pickup
The absolute bane of the DIY epoxy enthusiast is a phenomenon known throughout the industry as hot-tire pickup. You complete your weekend project, admire the glossy speckled sheen, allow the floor to dry for the prescribed seventy-two hours, and carefully drive your car back into the bay. A few weeks later, you back out of the garage only to find two or four rectangular patches of bare concrete where your tires had rested.
Hot-tire pickup occurs through a combination of thermal softening and chemical migration. When you drive on an asphalt highway, your vehicle’s radial tires heat up substantially from rolling friction. When you park the vehicle, those hot tires transmit heat directly into the floor coating.
Because water-based DIY epoxies possess relatively low glass transition temperatures, the thermal shock temporarily softens the thin plastic film. Simultaneously, the synthetic compounds and plasticizers within the tire tread create a strong chemical vacuum against the softened coating. As the tires cool and contract, their mechanical grip on the epoxy becomes stronger than the epoxy’s bond to the smooth concrete underneath. The next time you turn the steering wheel or reverse, the tires simply pull the floor coating straight off the slab.
The Hidden Costs of the Budget Route
When assessing whether a DIY kit is worth the effort, calculating the financial equation strictly by the purchase price of the box is a serious oversight. The true cost of an installation involves all the ancillary tools and preparation equipment required to give the floor even a fighting chance of survival:
-
Heavy-duty concrete crack repair elastomers to fill control joints and spider cracking.
-
Specialized degreasers and concrete cleaners.
-
Rental fees for a commercial floor buffer or diamond grinder if you choose to bypass unreliable acid etching.
-
High-grade, lint-free chemical-resistant rollers, extension poles, and notched squeegees.
-
Respirators, safety goggles, and spiked shoes that allow you to walk across wet resin without ruining the finish.
Once you tally these supplemental expenses, the initial budget figure often doubles or triples.
Worse still is the labor penalty of a failed installation. If a DIY epoxy floor begins peeling after two years, you cannot simply roll a fresh coat over the damaged areas. New epoxy will not bond reliably to a failing, delaminating surface. The entire failed coating must be completely ground off back down to bare concrete. Removing stubborn, gummy, partially adhered water-based epoxy with a diamond grinder is significantly more difficult, messy, and expensive than grinding virgin concrete from the start.
When Does a DIY Kit Actually Make Sense?
Despite the structural limitations of consumer-grade kits, there are specific scenarios where tackling the project yourself remains a rational, cost-effective decision.
If your garage is primarily a light-duty workspace, an exercise area, or a general storage zone where vehicles are rarely or never parked, the risk of hot-tire pickup drops to zero. In these low-stress environments, a properly prepared DIY epoxy paint provides a clean, dust-free surface that sweeps easily and resists light household spills.
Similarly, if you are staging an older home for an immediate sale on a modest budget, a DIY kit can deliver a fast cosmetic improvement that impresses prospective buyers during an open house, provided the slab is clean and sound.
Finally, if you manage your expectations realistically—viewing the kit as a durable, multi-year garage floor paint rather than a lifetime industrial finish—the project can be an enjoyable, satisfying DIY undertaking.
The Long-Term Equation
If you view your garage as a serious working shop, regularly store heavy vehicles driven daily, or want a permanent architectural floor that shrugs off dropped tools, battery acids, and road chemicals for twenty years, consumer DIY kits are rarely worth the heartbreak. The vast amount of physical labor required to prepare the concrete correctly deserves a commercial-grade polymer capable of matching your effort.
Investing in a professionally installed, multi-layer 100 percent solids epoxy and polyaspartic system certainly costs substantially more upfront. However, that cost buys industrial mechanical profiling, deep-penetrating moisture vapor barriers, high chemical resistance, and a lifetime free of peeling patches. If you decide to go the DIY route, enter the project with your eyes open: spend eighty percent of your energy on mechanical prep, rent professional tooling, and understand that in the realm of polymer chemistry, you almost always get precisely what you pay for.
Meta Title: