Transition Strips 101: How to Connect Two Different Floor Types
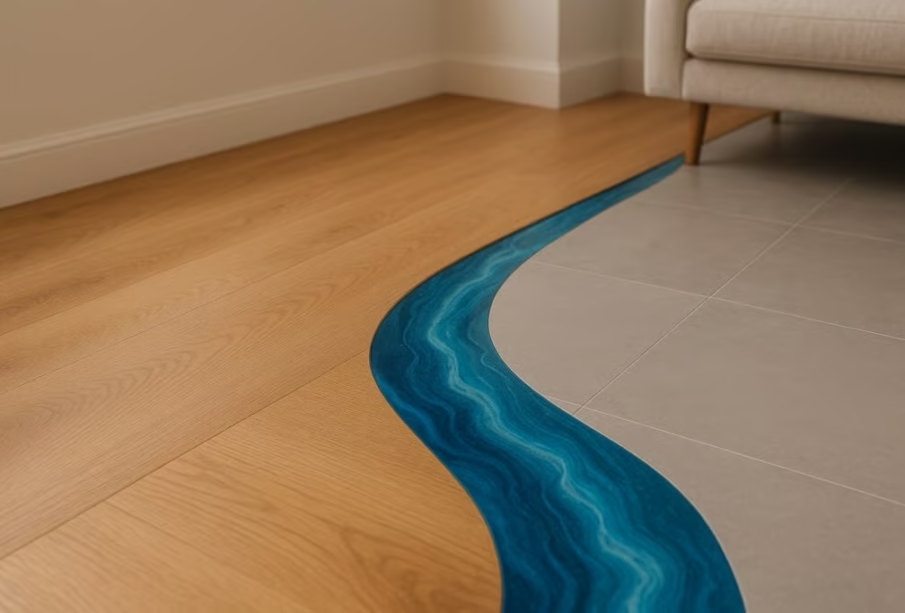
Few remodeling details carry as much weight as the borderline between two different floor coverings. When hard surface transitions cleanly to soft carpet, or when rich oak meets polished porcelain, a home feels carefully designed and expertly finished. Conversely, a clumsy joint or an uneven gap stands out immediately, acting as an everyday tripping hazard and an eyesore.
Bridging this gap successfully requires more than just picking a trim that roughly matches your plank color. Flooring materials expand, contract, and flex at entirely different rates. Some sit flush against the subfloor, while others hover over high-density acoustic underlayments. Understanding the mechanics of floor transitions allows you to preserve the structural integrity of both surfaces while creating a seamless visual flow throughout your home.
Why Floor Transitions Demand Careful Planning
Every flooring material has distinct structural habits. Solid hardwood expands laterally across its grain when humidity climbs during summer months, requiring a dedicated expansion gap along perimeter walls and doorways. Laminate and luxury vinyl plank float unattached above the subfloor, constantly drifting on a microscopic level as seasonal temperatures swing. Tile and stone, by contrast, are bonded rigidly in place with cementitious mortar, remaining completely static.
When two flooring styles converge in a doorway or across an open floor plan, you are fundamentally managing two conflicting physical behaviors. Forcing a rigid joint between a shifting floating floor and an unyielding ceramic border will inevitably cause buckling, peaked seams, or cracked grout lines.
Beyond structural necessity, transitions solve height discrepancies. A thick slate tile resting on concrete backer board can easily stand half an inch taller than a modern, ultra-thin sheet vinyl in an adjoining hallway. Without a gradual incline to ease that elevation change, residents and guests face stubbed toes and chipped edge tiles.
Identifying the Right Profile for Your Space
Not all transition profiles serve the same purpose. Manufacturers engineer specific shapes to solve unique structural, mechanical, and aesthetic challenges.
T-Moldings for Floors of Equal Height
A T-molding resembles the letter T when viewed in cross-section. Its central vertical stem drops into the gap between two surfaces, while the horizontal top wings extend outward to cap the raw edges of both sides.
T-moldings are strictly designed for adjoining floors that share the exact same finished height, typically with a tolerance variance of no more than one-sixteenth of an inch. They are most commonly installed between adjacent floating floors, such as where an engineered hardwood living room meets a laminate dining space, or in expansive rooms where long spans of floating floor require an intentional movement break.
Reducer Strips for Uneven Hard Surfaces
When two rigid or semi-rigid surfaces meet at noticeably different elevations, standard reducers step in to bridge the gap. These profiles feature a rounded or chamfered slope that guides foot traffic downward gently.
Hardwood reducers are standard when stepping down from a high-profile solid timber floor onto thin sheet vinyl, low-pile glued carpet, or polished concrete. A flush reducer fits snugly against the edge of a nailed-down timber floor, whereas an overlapping reducer leaves a hollow channel underneath to allow a floating plank to slide freely during seasonal expansion cycles.
End Caps and Thresholds
Often referred to as baby thresholds or square noses, end caps feature a distinct L-shaped profile. Rather than feathering down gradually like a reducer, an end cap establishes a clean, squared-off barrier against a taller obstacle.
End caps are ideal when flooring runs directly against sliding glass door tracks, vertical fireplace stone, exterior door sills, or deep-pile carpet. They hide rough cuts and provide the necessary expansion cushion while keeping the perimeter anchored and clean.
Carpet Grippers and Z-Bars
Transitioning from a hard surface onto wall-to-wall carpet introduces tension into the equation. Carpet requires mechanical stretching and anchoring to remain taut over its lifetime.
Metal carpet transitions feature sharp interior teeth that grip the backing of stretched carpet, clamping it securely next to hardwood or tile. In higher-end installations, flooring pros frequently favor concealed Z-bars. A Z-bar tucks neatly underneath the carpet pad, allowing the installer to fold the carpet edge over the tack strip and slip it invisibly into a pocket beside the tile edge, eliminating exposed aluminum strips entirely.
Selecting Durable, Cohesive Materials
Transition strips encounter concentrated friction. Every footstep traveling from room to room lands right on this narrow ridge, making material selection a matter of long-term durability.
Solid timber transitions offer unmatched longevity because you can plane them to custom angles, sand them smooth, and stain them to match existing floorboards perfectly. If a high-traffic hallway scuffs an oak T-molding over a decade of use, you can refinish it alongside the main floor without tearing out the entire doorway.
Anodized aluminum and solid brass profiles provide a sleek, architectural finish favored in contemporary interiors. Metal profiles excel in moisture-prone transitions, such as the threshold between a luxury vinyl plank hallway and a damp master bathroom. They will not warp, swell, or splinter under sustained exposure to moisture or heavy wheeled loads like vacuum cleaners and rolling luggage.
Laminate and vinyl-wrapped composite moldings are cost-effective choices that mimic photographic wood grains. While they deliver an exact visual match to specific vinyl plank collections, they feature a thin decorative foil wrapped over an engineered wood core. In high-traffic doorways, this foil can peel or wear through over time, making solid metal or genuine wood the better long-term choice for busy households.
Step-by-Step Installation Techniques
Executing a reliable transition requires patient measuring, precise cuts, and strict adherence to expansion principles.
Preparation and Accurate Measurements
Begin by inspecting the seam where the two floor coverings meet. Clean away all dried thinset, stray underlayment padding, and sawdust from the channel between the floors. The gap must be clean, dry, and sufficiently wide to allow movement without pinching the vertical stem of the molding.
Measure the doorway opening at two distinct points: right at floor level between the door jambs, and along the front edges of the trim. Door frames are rarely perfectly square. Transfer these measurements carefully onto your transition molding, noting any small corner notches you need to cope around the casing profiles.
Cutting the Molding
For wood, composite, and heavy vinyl profiles, use a high-tooth miter saw blade designed for finishing work. Cut the piece slightly proud on your initial pass. Test-fit the molding dry, shaving off paper-thin increments until it slips snugly between the door casings without bowing or binding against the jambs.
For metal profiles, switch to a non-ferrous metal cutting blade on your miter saw, or clamp the piece securely in a miter box and use a sharp 32-tooth hacksaw. Deburr the cut edges with a fine metal file to remove sharp ridges before placing the piece into the opening.
Fastening to the Subfloor
The golden rule of installing transition strips is absolute: never fasten the transition strip directly into a floating floor. The molding must anchor solely to the structural subfloor underneath, leaving the floor planks completely free to slide beneath its protective wings.
When working over plywood subfloors, apply a continuous bead of heavy-duty polyurethane construction adhesive directly onto the center of the subfloor channel, keeping the glue well away from the plank edges. Alternatively, screw down the plastic or metal U-track that comes supplied with many modern transitions, then press the molding stem firmly down into the track until it clicks into position.
If you are anchoring into a concrete slab, drill pilot holes using a masonry bit, tap plastic masonry anchors flush into the concrete, and secure the tracking strip with flat-head screws. If you rely on construction adhesive over concrete, weight the newly installed molding down with heavy toolboxes or stacks of tile for a full 24 hours to ensure a rock-solid mechanical bond before permitting foot traffic.
Avoiding Common Installation Mistakes
The most frequent mistake homeowners make is fastening a transition strip too tightly against the top surface of a floating floor. Driving finish nails straight through a T-molding and into the surface of laminate planks locks the floor in place. When seasonal humidity shifts arrive, the trapped floor will buckle upward in the center of the room, popping joints and ruining entire runs of flooring.
Another frequent oversight involves neglecting door swing clearances. Before permanently setting an elevated threshold or thick reducer, test the adjoining interior door. A low-hanging hollow-core door that cleared flat subfloors during construction may scrape aggressively across a newly installed, elevated hardwood reducer. Always check door clearance first; you may need to pop the hinge pins and trim a quarter-inch off the door bottom to maintain a smooth swing.
Investing the effort to profile your floor edges, respect thermal movement, and anchor moldings securely into the subfloor produces clean, durable transitions that elevate the entire room. A thoughtfully installed transition quietly protects your investment, standing up to millions of footsteps while presenting a polished, unified aesthetic from room to room.